How to Find and Treat Water on Your Backpacking Trip: Stay Hydrated and Safe
Water is one of the most critical elements for a successful backpacking trip. While the wilderness can be full of potential water sources like streams, rivers, and lakes, not all water is safe to drink. Contaminated water can contain harmful bacteria, parasites, and viruses that can cause serious illness. Knowing how to find a good water source and how to treat it effectively will keep you hydrated, healthy, and ready to enjoy your adventure.
In this post, we’ll cover how to locate safe water sources in the wild and the best methods for treating water while on your backpacking trip.
Finding a Good Water Source
Before you can treat your water, you need to find a reliable source. While water is plentiful in many areas, it’s important to choose wisely to avoid contamination.
What to Look For in a Good Water Source:
- Flowing Water: Always opt for water from a moving source like a river, stream, or spring. Flowing water is less likely to harbor harmful pathogens than stagnant water, which can contain bacteria, parasites, and debris.
- Clear and Clean Water: Clear water is often (but not always) cleaner than murky or cloudy water. If the water is full of sediment or algae, it’s best to find another source. However, even clear water should always be treated before drinking.
- Higher Ground: Try to collect water from sources located at higher elevations, such as mountain streams or springs. These sources are typically cleaner and less likely to be contaminated by agricultural runoff or animal waste.
- Shaded Areas: Water that’s in shaded areas is often cooler, which can reduce the growth of bacteria and algae. Look for streams that run through forested areas or shady spots.
Water Sources to Avoid:
- Stagnant Water: Avoid drinking from ponds, puddles, or lakes with no movement. Stagnant water is a breeding ground for bacteria, parasites, and other contaminants.
- Water Near Campsites or Trails: Water sources near established campsites or heavily trafficked trails may be contaminated with human or animal waste. Always aim to find a source further away from these areas.
- Downstream from Agricultural Areas: If you’re hiking in an area near farms or fields, be cautious of water sources downstream. Agricultural runoff can introduce harmful chemicals, pesticides, and animal waste into the water.
- Beaver Dams and Animal Activity: Avoid collecting water near beaver dams or areas with high animal activity. These areas can contain pathogens like Giardia, a parasite that can cause severe gastrointestinal issues.
Now that you’ve found a good water source, let’s explore the different methods for treating it to ensure it’s safe to drink.
Best Methods for Treating Water on the Trail
There are several ways to purify water in the wilderness, each with its own advantages and drawbacks. Here are the most common methods backpackers use to treat water during their trips:
1. Boiling Water:
Boiling is one of the most reliable ways to kill harmful bacteria, viruses, and parasites in your water. It’s especially effective if your water source is questionable.
- How to Boil Water:
- Bring your water to a rolling boil for at least 1 minute (or 3 minutes at higher altitudes).
- Let the water cool before drinking or transferring to a water bottle.
- Pros: Simple, effective, and requires no additional gear besides a stove or fire.
- Cons: Time-consuming and requires fuel or a fire, which may not always be practical.
2. Water Filters:
Water filters are popular among backpackers because they’re lightweight, portable, and effective at removing bacteria, protozoa, and sediment from water.
- Types of Filters: There are various types of filters, including pump filters, gravity filters, and straw filters (like the LifeStraw).
- Pros: Removes debris, bacteria, and protozoa like Giardia and Cryptosporidium. Many filters can process large amounts of water quickly.
- Cons: Filters do not remove viruses, so they should be used in combination with another treatment method in areas with known viral contamination.
3. Water Purification Tablets or Drops:
Water purification tablets or liquid drops (usually iodine or chlorine-based) are an easy and lightweight way to disinfect water.
- How to Use: Simply drop the tablet or solution into your water bottle, shake, and let sit for the recommended time (usually 30 minutes).
- Pros: Lightweight, easy to use, and no equipment required.
- Cons: Tablets may leave an unpleasant taste, and they can take 30 minutes or longer to fully treat the water. They may also not be effective against certain parasites like Cryptosporidium unless used for extended periods.
4. UV Light Purifiers:
UV light purifiers, such as the SteriPEN, use ultraviolet light to neutralize bacteria, viruses, and protozoa in the water. This method works quickly and is highly effective.
- How to Use: Insert the UV purifier into your water bottle and stir for the recommended time (usually 1-2 minutes).
- Pros: Quick, kills viruses (unlike most filters), and doesn’t affect the taste of the water.
- Cons: Requires batteries and doesn’t filter out sediment or debris, so you may still need to pre-filter the water.
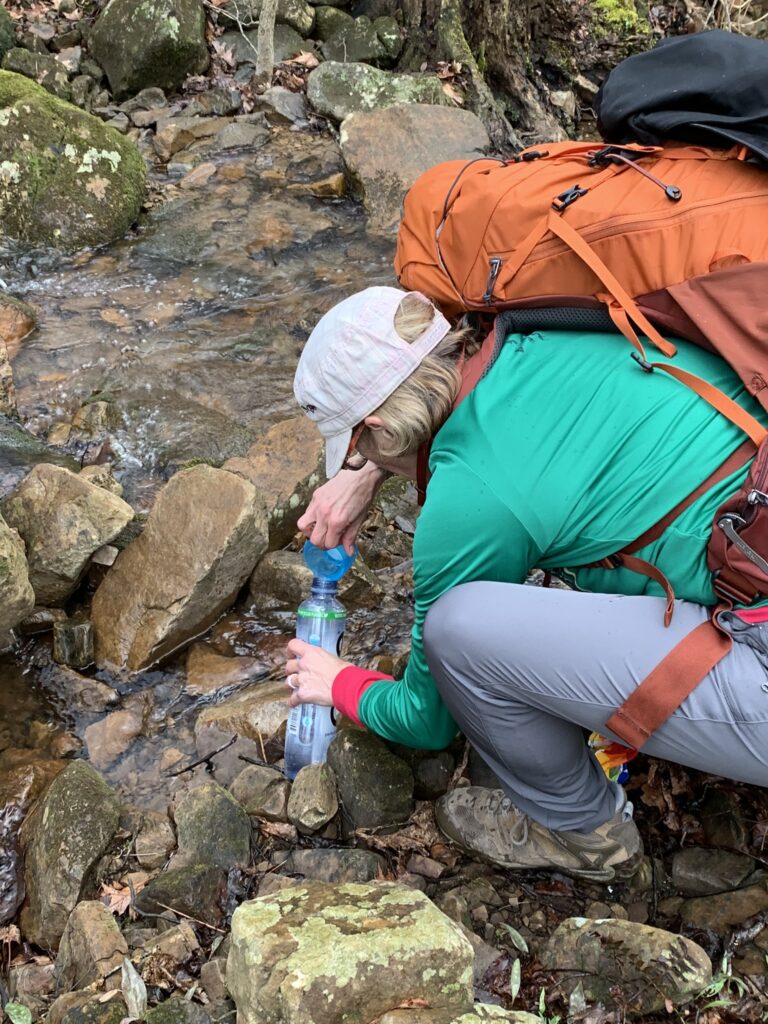
5. Squeeze Filters:
Squeeze filters like the Sawyer Squeeze are compact, easy to use, and allow you to treat water on the go. Simply fill a pouch with water from the source, attach the filter, and squeeze the water into your bottle.
- Pros: Lightweight, quick, and can remove bacteria, protozoa, and other particulates.
- Cons: Like other filters, they do not remove viruses, and the flow rate may slow down over time as the filter becomes clogged.
Which Method is Best?
The right water treatment method depends on your trip and the conditions you expect to encounter:
- For short hikes or areas with known clean water, a filter or UV purifier is quick and convenient.
- For longer backpacking trips or in areas where viral contamination is possible (like international treks), a combination of filtering and purification (tablets or UV) is ideal.
- Boiling is a great option if you have the time and resources, especially if you’re concerned about viruses.
Final Tips for Safe Water Collection and Treatment
- Always Treat Your Water: Even if it looks crystal clear, it’s best to err on the side of caution. Treat your water to avoid illnesses like Giardiasis or other waterborne diseases.
- Carry Backup Treatment: Things don’t always go as planned. Carry a backup water treatment method, like purification tablets, in case your filter breaks or you run out of fuel for boiling.
- Pre-Filter if Necessary: If you’re collecting water from a source with a lot of debris or sediment, use a bandana or a pre-filter to strain the water before treating it.
- Stay Hydrated: Always carry enough water for the day’s hike, especially in areas where water sources are sparse.
Water treatment is a vital part of staying safe on the trail. By knowing how to find a clean source and using the right purification method, you’ll ensure your water is not only refreshing but also safe to drink. Now, with these tips in hand, you can hike with confidence, knowing your hydration is covered!
Want more hiking tips? Sign up for the Just Hyke Newsletter and get the best advice on hiking, gear, and staying safe in the great outdoors! 🌲 #JustHyke #StayHydrated #BackpackingTips #OutdoorSafety