admin

The ultimate gift for hikers and campers. Just Hyke Trailmate
Trailmate

The Ultimate Gift for Hikers and Campers: Meet the Just Hyke Trailmate

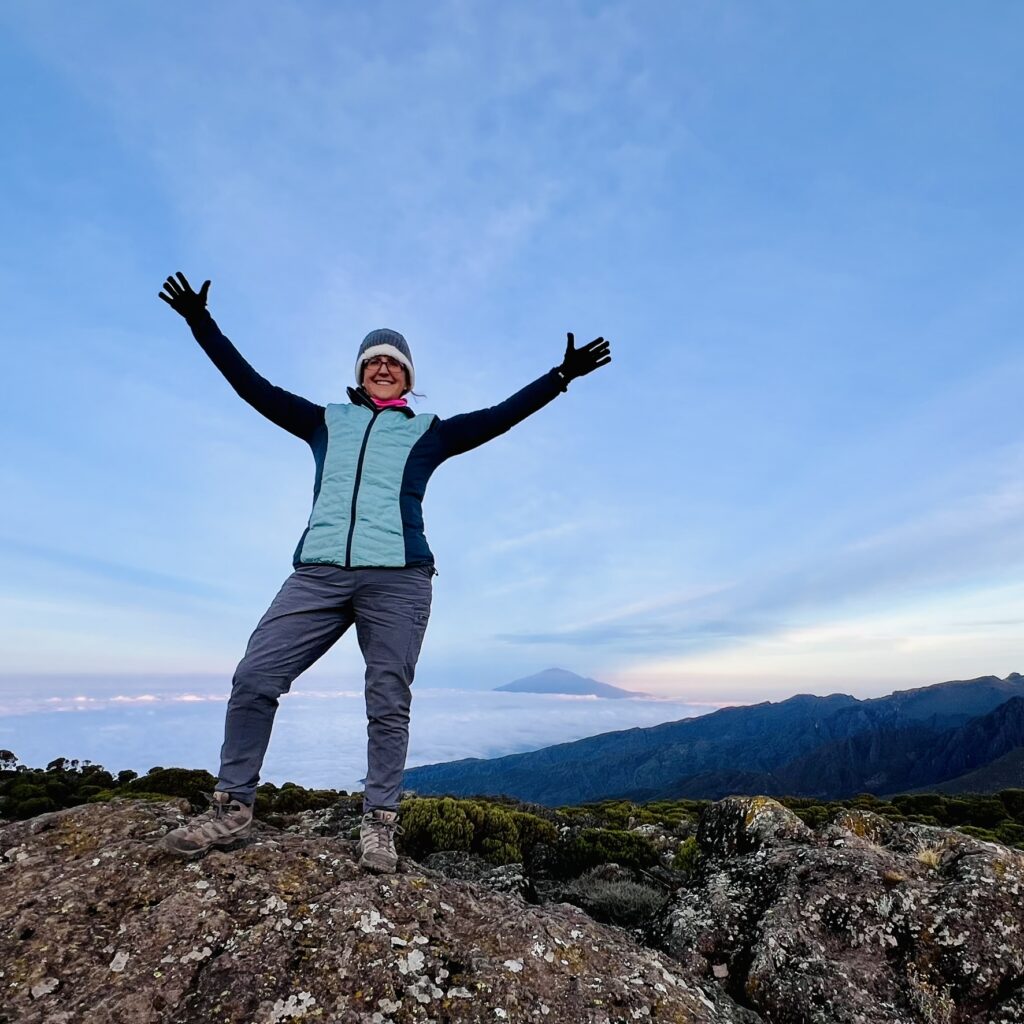
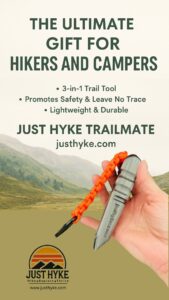
Why Every Hiker Needs a Reliable Trail Tool Whether you’re buying a gift for an outdoor enthusiast or upgrading your own gear, the best hiking gifts are the ones that actually get used on the trail. Lightweight, practical, and multi-purpose tools are essential for hikers who value both safety and sustainability. That’s where the Just Hyke Trailmate comes in – a small but mighty tool designed by hikers, for hikers. What Is the Just Hyke Trailmate? The Just Hyke Trailmate is a 3-in-1 outdoor multi-tool that fits easily on your backpack or belt loop. It’s 3D-printed for durability and made to help you stay safe and responsible on every hike. Here’s what it can do:✅ Works as a Leave No Trace trowel for burying waste properly.✅ Doubles as a tent-peg puller/pusher for easy campsite setup.✅ Functions as a self-defense force extender to add power for protection if needed. Each Trailmate includes 4.5 feet of paracord and carabiner.  The Just Hyke Trailmate can be customized in your favorite color combo just ask us! Learn more and order your Trailmate here. Designed with Leave No Trace Principles in Mind As hikers, we know that nature gives us everything — peace, beauty, strength — and it’s our job to protect it. The Just Hyke Trailmate makes it easy to follow Leave No Trace ethics, especially when it comes to waste disposal and campsite cleanliness. This makes it not just a tool, but a statement: we can adventure responsibly while keeping our trails pristine for future generations. A Smart Gift for Outdoor Lovers If you’re searching for gift ideas for hikers, campers, or outdoor adventurers, the Trailmate checks every box: Practical: It’s gear they’ll actually carry and use.Eco-friendly: Encourages Leave No Trace practices.Empowering: Adds confidence and safety to every hike.Affordable: A unique under-$30 gift that stands out from generic gear. Whether it’s for a birthday, Christmas, or a “just because” surprise, this tool says: I see your love for adventure – and I support it. Trail-Tested, Hiker-Approved The Trailmate has been tested by experienced hikers on rugged trails, from Texas to Tanzania. It’s lightweight enough for backpacking but sturdy enough for real-world use — whether you’re digging a cathole, adjusting a tent line, or clearing a small campsite. Each one is hand-crafted and 3D-printed in the USA by Just Hyke, a women-owned outdoor brand dedicated to empowering hikers through fitness, safety, and connection with nature. Ready to Hike Smarter? Get your Just Hyke Trailmate today and be ready for your next adventure — whether it’s a local trail or your bucket-list summit. Order yours now at JustHyke.com/shop » Classroom kits and group orders are also available — perfect for Scouts, outdoor education programs, and team-building events. About Just Hyke Founded by Melanie Michaelchuk, CPT-NASM, Just Hyke inspires women 40+ to build strength, confidence, and adventure readiness through hiking, nature, and community. Learn more about upcoming retreats, training programs, and hiking products at JustHyke.com

image of woman standing with arms raised above head on top of a mountain
Fitness

Train for Your 26-Mile Day Hike in Six Months, Build Endurance, Strength, and Confidence One Step at a Time

Build Endurance, Strength, and Confidence One Step at a Time Have you ever dreamed of completing a 26-mile hike in a single day? Picture yourself at the trailhead of your bucket-list trek—the morning air is crisp, your pack feels balanced, and your body feels ready. You’re not just hoping to finish—you know you’ve trained for this. With the right six-month hiking training plan, you can build the endurance, strength, and mindset you need to crush a full-day adventure on the trail. 🎧 Podcast Tip: On the Just Hyke Podcast, I recently sat down with Monica Rose, UESCA-certified ultra endurance and nutrition coach. She shared fueling strategies and mindset tips that work not just for ultra-runners, but also for hikers preparing for long-distance and multi-day hikes. If you want to go deeper into nutrition and mental preparation, listen to the episode here. Why Endurance Training Matters for Long-Distance Hikes A 26-mile day hike is a challenge of both body and mind. You’ll be on your feet for 10–14 hours, covering rugged terrain, climbing hills, and carrying your gear. Without training, fatigue and injury can cut your adventure short. With training, you’ll move efficiently, avoid soreness, and actually enjoy the journey from start to finish. The Importance of “Time on Your Feet” It’s not just about mileage—it’s about training your body for long hours of movement. If your hike will take 12 hours, your body should be comfortable being active for 12 hours. You can train this by: Extending shorter hikes by slowing your pace or adding elevation Practicing with your backpack loaded with gear Building stamina so your muscles, joints, and feet stay strong all day This kind of preparation ensures you don’t hit a wall halfway through your big hike. Six-Month Training Plan for a 26-Mile Hike Weekly Training Checklist ✅ 3 midweek walks/hikes (2–6 miles) 1 long weekend hike (progressively increasing distance) 2 strength training sessions (lower body, core, pack support) 1 cross-training day (cycling, swimming, yoga, or stair climbing) 1 rest day (true recovery) 💡 Listen to your body—swap a walk for yoga or stretching if you need more recovery. Months 1–2: Build Your Base Walk 2–5 miles, 3–4 times a week Weekend hikes: 4–6 miles on trails Bodyweight strength: squats, lunges, planks, step-ups Goal: Comfortably hike 6–8 miles without soreness Months 3–4: Add Distance & Pack Weight Weekend hikes: 10–12 miles Train with a 10–15 lb backpack Add cross-training for cardio variety Goal: Hike back-to-back days (e.g., 8 miles + 6 miles) Months 5–6: Simulate the Challenge Long hikes: 18–20 miles (4–6 weeks before your hike) Carry your full pack with gear, food, and water Practice pace and elevation gain Goal: Finish training hikes with energy left in the tank Don’t Forget These Essentials Nutrition: Eat trail snacks every 60–90 minutes Hydration: Train with the hydration system you’ll use on the big day Foot Care: Break in shoes and test sock combinations early Mindset: Use mantras, counting, or mental strategies to stay positive The Payoff By following this six-month hiking training program, you’ll build endurance, confidence, and strength to handle every mile of your 26-mile hike. When the big day comes, you won’t just survive—you’ll thrive. You’ll reach the summit smiling, knowing you showed up for yourself one step at a time. Disclaimer: This article is for educational purposes only and is not a substitute for medical advice. Always consult your doctor before starting a new exercise or training program, and adjust based on your individual health and fitness level. Let’s Hear from You What’s your training tip? Hit reply and share it—we might feature it in the next newsletter! Stay adventurous, Melanie Michaelchuk Founder, Just Hyke info@justhyke.com Visit Just Hyke

text in image say stay hydrated, hyke stong, choose your trail fuel
Uncategorised

Tired, Foggy, and Cramping on the Trail? Here’s the Real Reason Women Over 40 Struggle to Stay Energized—And How to Fix It

This post contains affiliate links. As an Amazon Associate and IDLife Affiliate, I may earn a small commission at no extra cost to you. I only recommend products I personally use and trust. If you’re a woman over 40 and love to hike—especially in the Texas heat—you’ve probably experienced it: 💢 Your legs feel heavy.💢 You get that throbbing “heat headache.”💢 You’re drinking water, but still feel dizzy, foggy, or completely drained. That’s not just dehydration—it’s an electrolyte imbalance. And as we age, our bodies need more strategic hydration to perform, recover, and feel good outdoors. Why Electrolytes Matter More After 40 When we sweat, we lose more than just water—we lose sodium, potassium, and magnesium. These essential minerals regulate everything from muscle function to brain clarity. And guess what? Our ability to retain water and electrolytes decreases with age, making it even more important to actively replenish them—not just sip water. Symptoms of electrolyte imbalance on the trail: Muscle cramps Headaches or nausea Brain fog and slower reaction time Fatigue, even early in your hike A sense of “just not feeling right” The Right Hydration = Stronger, Safer Hikes Especially for women 40+, proper hydration with electrolytes helps you: ✅ Prevent muscle fatigue and cramping✅ Stay alert, balanced, and energized✅ Regulate body temperature in extreme heat✅ Push further with confidence✅ Recover faster and reduce post-hike aches 🔄 Two Hydration Mixes I Trust (and Use Personally) Here are two electrolyte drink mixes that have helped me—and the women I coach—feel stronger, clearer, and safer on hot, sweaty hikes. 1. Just Hyke Hydration Mix Formulated by hikers, for hikers—especially for those big, sweaty, high-output days. Balanced sodium, potassium, and magnesium Clean ingredients, no fillers Designed for long hikes and hot conditions Subtle taste—no artificial junk 👉 Order Just Hyke Hydration Mix 2. IDLife Hydrate Great for daily hydration, lighter hikes, or immune support—especially if you prefer a flavorful, all-in-one boost. Electrolytes + vitamins B/C, antioxidants, and MCTs Sugar-free and naturally sweetened Convenient stick packs—great for on-the-go Tastes fruity and refreshing 👉 Order IDLife Hydrate 🔍 At-a-Glance Comparison Feature Just Hyke Hydration Mix IDLife Hydrate Electrolytes High-performance for endurance Balanced for daily use Extras No extras—pure hydration support Vitamins, MCTs, antioxidants Sugar Content No added sugar Stevia-sweetened, sugar-free Best For Long hikes, heat, sweating Everyday hydration, short/moderate hikes Format Bulk pouch Stick packs Taste Mild and clean Fruity and refreshing 💬 Final Thoughts If you’re over 40 and love hiking, you can’t rely on plain water alone. Your hydration plan needs to work with your body, not against it. Choose Just Hyke Hydration for big trail days, heat, and long hauls. Choose IDLife Hydrate for daily sipping, recovery, and added nutritional support. Hydrate with purpose—and keep enjoying the trails for years to come. 💧🌿 ✅ Ready to Hike Smarter? 👉 Get Just Hyke Hydration Mix👉 Shop IDLife Hydrate Affiliate Disclosure: I only share products I use and love. If you purchase through one of my links, I may earn a small commission—thank you for supporting my mission to help women hike stronger, safer, and longer. About the Author Melanie Michaelchuk, CPT-NASM is a certified personal trainer, stretch and flexibility coach, hiking retreat leader, and founder of Just Hyke—a wellness brand built to help women over 40 embrace the outdoors and reach new heights. She’s summited Mount Kilimanjaro, backpacked across Iceland, and leads fitness and hiking programs that empower women to train for life’s biggest adventures. Melanie is also an international best-selling author, sharing her journey in the book Six Figure Chicks: Houston Vol. 1, where she inspires readers to show up, take the first step, and never stop climbing—on the trail and in life. Explore more at 👉 JustHyke.com

text in image say stay hydrated, hyke stong, choose your trail fuel
Uncategorised

When You’re Low on Electrolytes, you may Experience: Muscle Cramps, Fatigue, Dizziness or “Brain Fog”

Hydration is Key to Hiking Success – Especially in the Texas Heat! When you’re hiking in Texas, hydration isn’t just important—it’s critical. Whether you’re doing trail maintenance, climbing that summit, or hiking your first few miles, your body loses more than just water when you sweat. You’re also losing key electrolytes like sodium, potassium, and magnesium—minerals that keep your muscles working, your brain sharp, and your energy stable. ❗Why Electrolytes Matter on the Trail When you’re low on electrolytes, you may experience: Muscle cramps Fatigue Dizziness or “brain fog” Slower reaction times Headaches and nausea Sound familiar? That’s your body telling you it needs more than just water.   🧠💪 Electrolytes Boost Hiking Performance Proper electrolyte hydration helps you: Prevent cramps and muscle fatigue Stay mentally focused and alert Regulate your body temperature in hot, humid weather Push longer and recover faster after your hike And when you’re sweating hard on a Texas trail—you need a mix that’s built for it.   🔄 Two Great Hydration Options for Hikers I recommend two trusted hydration products to help you stay fueled and ready, whether you’re climbing mountains or walking your local loop: 🥤 1. Just Hyke Hydration Mix Clean, no-filler formula made for sweaty trail days Includes sodium, potassium, and magnesium for max performance Designed by hikers, for hikers Great for high-exertion or long-distance hikes in hot climates 👉 Order Just Hyke Hydration Mix here 🍉 2. ID Life Hydrate Electrolytes + vitamins + antioxidants in convenient stick packs Naturally sweetened, sugar-free Includes B vitamins, vitamin C, coconut water, and MCTs Great for everyday use, moderate hikes, and immune support 👉 Order ID Life Hydrate here 🔍 Quick Comparison Table Feature Just Hyke Hydrate ID Life Hydrate Electrolytes High-performance formula Moderate, for general hydration Extra Nutrients No extras, just what hikers need Vitamins, MCTs, antioxidants Sugar Content Low or no added sugar Stevia-sweetened, sugar-free Best For Hot/hard hikes, endurance Daily hydration, moderate activity, family use Format Bulk container Single-serve stick packs Taste Clean and subtle Fruity and refreshing (multiple flavors) 💬 Final Thoughts Both options are excellent—it depends on your needs. Choose Just Hyke for intense trail days and humid heat. Choose ID Life Hydrate for daily use or when you want added vitamins and flavor options. 💧 No matter which you choose—stay hydrated, hike strong, and recover smarter. Your brain and body will thank you! #JustHyke #HydrationIsKey #HikeTexas #WomenWhoHike #StayFueled #ElectrolytesMatter #IDLife #TrailPerformance ✅ Grab Your Mix Today: Just Hyke Hydration Mix ID Life Hydrate

Uncategorised

🚺 Nature’s Call? Your Guide to Peeing in the Woods with Confidence

🚻 How to Pee in the Woods (Without Peeing on Your Boots) Let’s be real, ladies — when nature calls and you’re in nature, things can get… tricky. I’m a fan of dirt trails, wildflowers, and stunning views — not soggy socks or an accidental splash-down. So let’s talk about it: how to pee in the woods like a pro. 💛 First, the Gear That Makes Life Easier I never hit the trail without two essentials that changed the game for me: My ZipHers pants – because when you can unzip and go without undressing, you’re winning. My Pee Style device – because squatting over a cactus isn’t ideal. These tools let you stand, aim, and get back on the trail without baring your backside to the birds. 🔗 Check out the gear I swear by here:👉 Melanie’s Tried and Tested Hiking Essentials on AmazonAs an Amazon Associate, I earn from qualifying purchases—at no extra cost to you. I only recommend items I personally use and love. 😬 The Challenges Are Real Peeing in the woods isn’t always glamorous. Some of the common struggles we all deal with: 🚫 The Fear of Peeing on Your BootsOne wrong angle and, well, splash zone. 👖 The Pants PredicamentGetting your waistband down without exposing everything or falling over? It’s an art. 🌲 No Tree in SightSometimes you’re in wide open terrain… and that chipmunk is definitely watching you. 🧻 Forgot the TP or WipesLeaf identification is not a skill you want to learn mid-stream. 🚻 Trail Buddy AnxietyYou thought you had privacy but turns out… nope. 💡 Tips to Master the Trail Tinkle Here are a few tips to make the process cleaner, faster, and way less stressful: ✅ Practice with your pee funnel at home first! Aim is everything. 🧍 Find a slight downhill slope behind you so liquid runs away from your boots. 🌳 Use a tree for balance — lean back and squat slightly for better control. 🧻 Always pack a pee kit: wipes, a ziplock for trash, and hand sanitizer. 🧴 Dry-off cloths or pee cloths like a Kula Cloth are eco-friendly and easy to clean. 🙌 Final Thought: Don’t Be Shy Peeing outdoors is a skill — just like hiking, navigating, or packing your backpack. You’ll get more confident with time. The key is preparation, laughter, and not stressing if things go a little sideways. (Just don’t forget the extra socks. 😉) So grab your ZipHers, your funnel, and hit the trail like the wilderness queen you are. 🌲 Happy hiking — and happy peeing! —Melanie MichaelchukFounder, Just HykeExplore Hiking Essentials on Amazon

Uncategorised

Beat the Bugs, Train Your Toes, and Get Ready for a Big Book Reveal!

Hey there, hiking friends! 🪰 Let’s talk bugs… If you’ve ever been swarmed by deer flies, mosquitoes, or ticks while out on the trail—you know how annoying (and painful) it can be. This time of year, those little suckers are out in full force. 😣 🛡️ Good news — I’ve added some tried-and-tested bug repellents to my Amazon list to help you stay bite-free: Powerful sprays for ticks and mosquitoes Natural options that are safe for skin and gear And one of my personal faves: dragonfly clips that attach to your hat or backpack! These work because deer flies are territorial and will avoid areas where it looks like another insect is already hanging out. 🧠 Nature is wild—and smart! 👉 View My Favorite Bug Repellents on Amazon   📌 Disclosure: As an Amazon Associate, I earn a small commission from qualifying purchases—at no extra cost to you. I only share items I use and love! 📚 Also, exciting news… My chapter about summiting Mount Kilimanjaro will be featured in an upcoming collaborative book created by women, for women! 💪 It’s a collection of powerful stories about grit, mindset, and rewriting your personal summit. I need your help! — release date is June 14! Purchase the e-book that day and help women in business become bestselling authors! Want to go the extra mile and really help me out? Buy the e-book AND leave a review. That really helps the algorithms and will put us over the top. Moving along here is a great training tip. 👣 Training Tip: How Are Your Feet Holding Up? If you’re prepping for long hikes or just walking more, don’t forget your feet need space—literally. Your toe box (the front of your shoe) should be wide enough for your toes to splay naturally. This is key for balance, stability, and preventing pain or blisters. Bonus tool: I use toe spacers during downtime to help realign and strengthen foot muscles. They support better posture and may even help you hike longer and more comfortably. 👉 Check Out My Foot Care Recommendations Here’s to happy, healthy hiking—no bites, no blisters, just strong strides! – Melanie Michaelchuk Founder of Just Hyke www.justhyke.com

Food and Recipes

Backpacking Recipies

1. Tuna Couscous Bowl Ingredients: 1 pouch (2.6 oz) tuna (any flavor) 1/2 cup instant couscous 1 tbsp olive oil or single-serve packet Salt-free seasoning blend or lemon pepper (optional) Instructions: Boil 2/3 cup water. Stir in couscous and olive oil. Cover and let sit for 5 minutes. Stir in tuna and seasoning. Eat warm or chilled. 2. Ramen Peanut Noodles Ingredients: 1 pack ramen noodles (discard seasoning packet) 1 tbsp peanut butter 1 tbsp soy sauce (or single-serve packet) Red pepper flakes (optional) Instructions: Cook ramen noodles in 2 cups boiling water. Drain most water, stir in peanut butter and soy sauce. Mix until creamy. Sprinkle with chili flakes if desired. 3. Trailside Taco Wrap Ingredients: 1 foil pouch seasoned chicken or beef 2 flour tortillas 1/4 cup instant rice (Minute Rice or similar) Taco seasoning or hot sauce packet Instructions: Rehydrate rice with hot water (cover with boiling water, let sit 5–7 mins). Mix rice with chicken/beef and seasoning. Spoon into tortillas, roll, and enjoy! 4. Lentil Soup in a Mug Ingredients: 1/2 cup instant lentil soup mix (or pre-portioned dehydrated mix) 1 cup water 1 tbsp olive oil or ghee (optional) Crushed crackers or bread cubes (optional topping) Instructions: Add lentil mix to mug or cook pot with water. Bring to a boil, simmer 5–7 minutes until thickened. Stir in oil and top with crushed crackers if you have them. 5. Instant Mashed Potato Bowl Ingredients: 1/2 cup instant mashed potatoes 1/4 cup dehydrated beans or lentils 1 tbsp powdered cheese or nutritional yeast Garlic powder or bouillon cube (optional) Instructions: Add hot water to potatoes and beans (about 3/4–1 cup). Stir until creamy and beans are softened (let sit longer if needed). Mix in cheese powder and seasoning to taste. 6. Cheesy Mac & Peas Ingredients: 1/2 cup instant mac & cheese (dehydrated or box mix) 1/4 cup freeze-dried peas 1 tbsp powdered milk (optional for creaminess) Salt & pepper or garlic powder (optional) Instructions: Boil 1 cup water. Add mac, peas, and powdered milk to pot. Stir and simmer until pasta is soft and cheese is creamy (about 6–8 mins). Season and serve hot. 7. Savory Oats with Veggies Ingredients: 1/2 cup quick oats 1 tbsp nutritional yeast 1/4 cup dehydrated mixed veggies Dash of salt or broth powder (optional) Instructions: Boil 3/4 cup water. Add all ingredients and stir well. Let sit for 5–7 minutes until oats and veggies soften. Enjoy warm, like a trail porridge with a savory twist. 8. Shepherd’s Pie Mash-Up Ingredients: 1/2 cup instant mashed potatoes 1 pouch beef jerky or dehydrated ground beef 1/4 cup dehydrated peas or carrots Gravy packet (optional but tasty!) Instructions: Rehydrate potatoes, beef, and veggies with hot water (about 1 cup). Stir until creamy and hot. Mix in gravy powder if using and enjoy a hearty trail meal. 9. Coconut Curry Rice Ingredients: 1/2 cup instant rice 1 tbsp coconut milk powder 1 tsp curry powder 1/4 cup freeze-dried veggies or lentils (optional) Instructions: Boil 3/4 cup water. Add rice, coconut powder, curry, and veggies. Let sit 8–10 minutes, stir well, and eat hot. 10. Chili Cheese Bowl Ingredients: 1/2 cup dehydrated chili mix (or instant chili beans) 1 tbsp cheese powder or shredded cheese (shelf-stable) Tortilla chips or crackers (for topping) Hot sauce packet (optional) Instructions: Add hot water to chili mix (about 1 cup). Let sit or simmer until thickened. Stir in cheese powder, top with crushed chips, and dig in! All of these recipes are: Lightweight No refrigeration needed Easy to make with just boiling water and one pot Customizable with extra spices, sauces, or dehydrated veggies Packing Tips for Backpacking Meals 🔹 1. Pre-Measure and Pre-Pack Individual Meals Use quart-sized freezer Ziploc bags or reusable silicone bags. Label each meal with a Sharpie (e.g., “Dinner Day 1: Ramen Peanut Noodles”). Include cooking instructions right on the bag with a marker or sticker. 🔹 2. Use Single-Serve Condiments Bring soy sauce, olive oil, peanut butter, and hot sauce in small packets (often found at restaurants or bought in bulk online). Store all condiments in a snack-size bag to avoid leaks. 🔹 3. Pack a Spice Mini-Kit Carry a few spice straws or small containers with essentials: salt, pepper, garlic powder, or curry powder. Film canisters, Tic Tac boxes, or refillable pill organizers work well. 🔹 4. Double-Duty Ingredients Choose ingredients that can be used in multiple meals (e.g., instant rice, olive oil, or freeze-dried veggies). Saves space and weight in your bear bag or food sack. 🔹 5. Use a Collapsible or Lightweight Pot Opt for a Titanium or aluminum pot with a tight lid. A lid that doubles as a strainer can be handy for draining noodles. 🔹 6. Bring a Mug-Style Insulated Container Works great for “re-hydrate and sit” meals like lentil soup or mashed potatoes. Keeps food warm longer and saves fuel. 🔹 7. Consider a Cozied Bag for Soaking Use an insulated cozy or DIY one with bubble wrap or foam to let food cook off-heat. Great for saving fuel when rehydrating lentils, rice, or oats. 🔹 8. Trash Management Always pack a zippered trash bag or a designated stuff sack for used food bags and wrappers. Bring a small odor-resistant bag if you’re hiking in bear country. 🔹 9. Water-Efficient Cooking Choose meals that need minimal water (like instant potatoes or couscous). Bonus: the water used can double as cleanup water if you eat directly from the bag. 🔹 10. Fuel Smart Plan meals that require only boiling water to reduce stove time and fuel use. No-cook or soak-friendly options can help if your fuel runs low.

Food and Recipes

How to Build a Mini Spice Kit

Option 1: Spice Straws (DIY Single-Use Tubes) Lightweight, waterproof, and fun to make! ✂️ You’ll Need: Plastic drinking straws (wide straws like smoothie straws work best) Scissors Lighter or candle Needle-nose pliers or tweezers Small funnel or piece of paper (for pouring spices) 🧪 Steps: Cut the Straw into 2–3 inch sections. Seal One End:  Use pliers to pinch one end closed. Hold that end near a flame (briefly!) until it melts and seals shut. Let it cool completely. Fill with Spice:  Use a mini funnel or folded paper to pour spice into the open end. Don’t overfill—leave about 1/2 inch at the top. Seal the Other End:  Pinch it with pliers and seal using the flame just like before. Label with a Marker (e.g., “C” for Curry, “G” for Garlic, etc.) Store all your spice straws in a small Ziploc bag or mint tin. Option 2: Pill Organizer or Mini Jars 🧪 Supplies: Weekly pill organizer, empty Tic Tac boxes, or mini jars with screw lids Permanent marker or label stickers Small funnel (or paper triangle) 🧂 Steps: Clean and Dry your containers. Add Spices using a funnel. Label each compartment or box. Store the kit in a small mesh bag or zip pouch with your cooking gear. 🌶️ Great Spices to Include: Salt & pepper Garlic powder Onion flakes Curry powder Chili flakes Italian herbs or taco seasoning Cinnamon (for oatmeal!)

Food and Recipes

Campfire Recipes

1. Campfire Skillet Pizza Ingredients: 1 can premade pizza dough (like Pillsbury) 1/2 cup shredded mozzarella cheese Sliced pepperoni (Optional: pizza sauce or tomato paste) Instructions: Lightly oil the cast iron pan and heat it over the fire or stove. Press out the dough to fit the skillet (you may need to use only half the can for one pizza). Cook dough for 2–3 minutes until the bottom starts to brown, then flip. Add cheese and pepperoni (plus a little sauce if using) on the browned side. Cover loosely with foil or lid and cook for another 3–5 minutes until cheese is melted and crust is golden. 2. Beef & Veggie Stir-Fry Ingredients: 1/2 lb shredded cooked beef or beef strips (pre-cooked or vacuum-packed) 2 cups pre-packaged chopped fresh veggies (like stir-fry mix or fajita mix) 1 tbsp oil (olive or sesame) Soy sauce or teriyaki packet (optional) Instructions: Heat oil in cast iron skillet over medium-high heat. Add veggies and cook 5–6 minutes, stirring frequently. Add beef and stir until heated through (another 3–4 minutes). Drizzle with soy or teriyaki sauce, mix well, and serve hot. 3. Grilled Chicken & Cheese Quesadilla Ingredients: 2 flour tortillas 1/2 cup shredded cheese (cheddar or Mexican blend) 1/2 cup cooked grilled chicken (sliced or shredded) Salsa or hot sauce for serving Instructions: Heat cast iron pan and lightly oil it. Lay one tortilla in the skillet. Add cheese and chicken on top. Place the second tortilla over the filling and press gently. Cook for 2–3 minutes until golden, then flip and cook the other side. Slice and serve with salsa. 4. Skillet Sweet Potato & Black Bean Hash Nourishing, fiber-rich, and energizing—great for post-hike recovery! Ingredients: 1 medium sweet potato, peeled and diced (helpful hint: pre cooked saves fuel) 1/2 cup canned black beans (drained and rinsed) 1/4 cup chopped onion or bell pepper (optional) Olive oil + seasoning (salt, pepper, cumin, or taco spice) Instructions: Heat 1 tbsp oil in your cast iron skillet. Add sweet potatoes and cook 8–10 minutes (bring precooked to save fuel), stirring occasionally, until soft and golden. Add onion/pepper and cook 3 more minutes. Stir in black beans and seasonings. Heat through and serve warm—top with avocado or hot sauce if you brought some! 5. Garlic Butter Shrimp with Zucchini Noodles (Zoodles) A light, low-carb dish packed with protein and flavor. Ingredients: 1/2 lb cooked shrimp (peeled & deveined) 1–2 zucchini, spiralized (or bring pre-spiralized zoodles) 1 tbsp garlic butter or mix of butter + minced garlic Lemon wedge or Italian herbs (optional) Instructions: Melt garlic butter in the cast iron skillet over medium heat. Add shrimp and cook for 2–3 minutes until warmed and lightly browned. Toss in zoodles and sauté for another 2 minutes until tender but still crisp. Squeeze lemon or sprinkle herbs if desired. Serve immediately.

Uncategorized

🌿✨ Curious about Forest Bathing? ✨🌿

It’s so interesting… my Hike Leader’s Guide to Forest Bathing has become my best seller on Etsy! 💚 This e-guide is designed for outdoor leaders, educators, and wellness coaches who want to add something deeply meaningful to their hikes. It’s full of practical tips, guided prompts, and easy-to-lead activities that help people slow down, connect with nature, and walk away feeling grounded and refreshed. If you’ve been looking for a way to bring more mindfulness, calm, and connection to your outdoor adventures—this is it. 🍃 Perfect for:✔️ Hiking leaders✔️ Retreat hosts✔️ Yoga and wellness practitioners✔️ Teachers and guides who love the outdoors ➡️ Click the link to see why it’s helping so many people transform their hikes into something magical:🛒 https://justhyke.etsy.com/listing/1801406942 Let nature do the healing. You just need the right tools to guide the way. 💫 #ForestBathing #NatureHeals #JustHyke #MindfulHiking #OutdoorWellness #EtsyFinds #HikingGuide

Scroll to Top